Operation Manual
This guide walks you through every step of using your Password Keeper device — from initial connection to password management.
Before using the device, check for version updates and upgrade the firmware — click here to update.
Part 1: Device Connection
Connect the Device
Insert the Password Keeper device into your computer's Type-C port.
Insert the device into the Type-C port
Open Device Manager
Open Chrome browser (Chrome has the best compatibility) and navigate to:
Click the "Connect" button on the page.
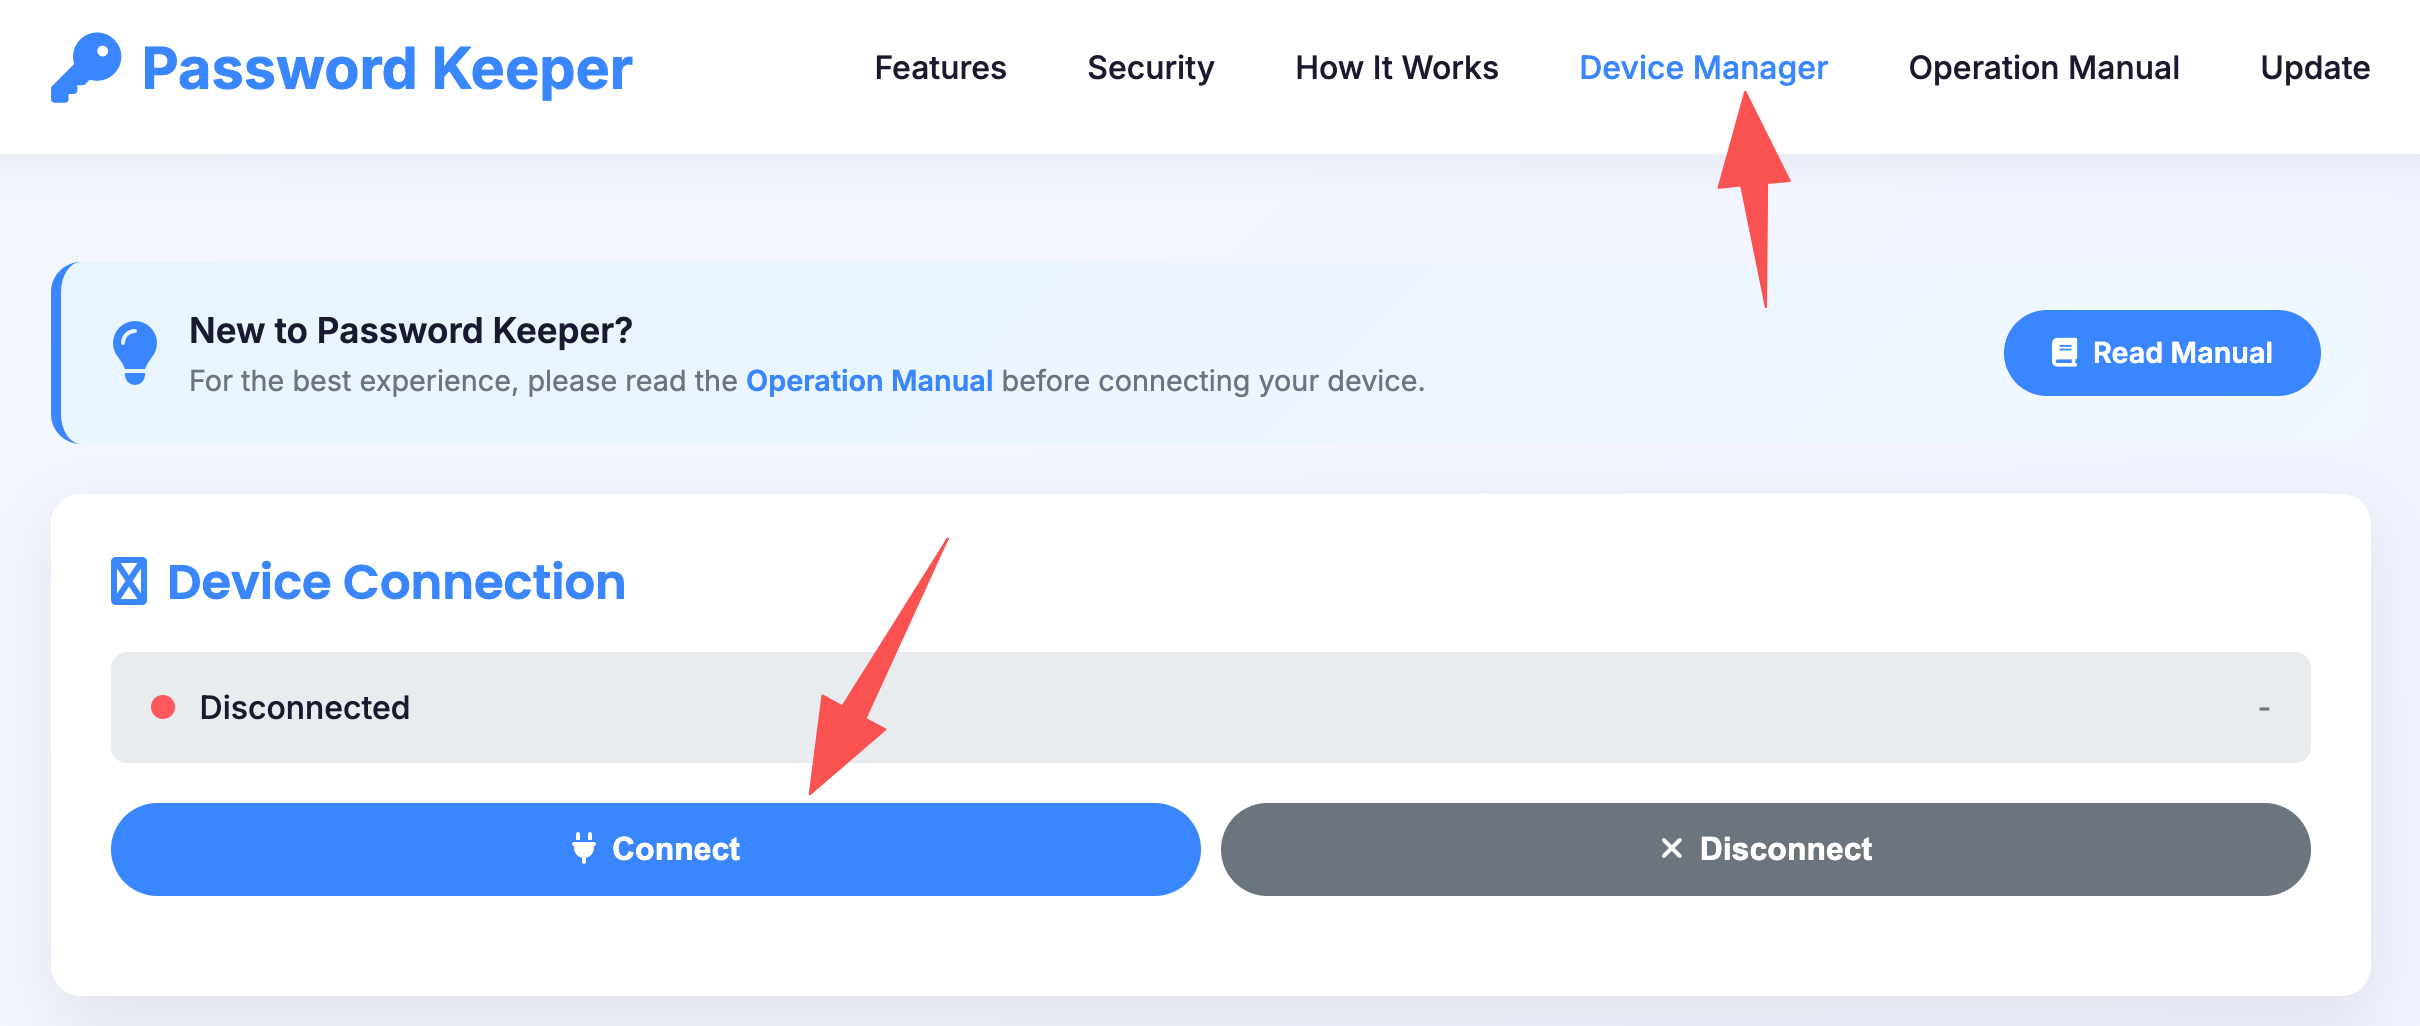
Click Connect on the Device Manager page
Select Your Device
Chrome will show a popup window. Select your device from the list, then click "Connect".
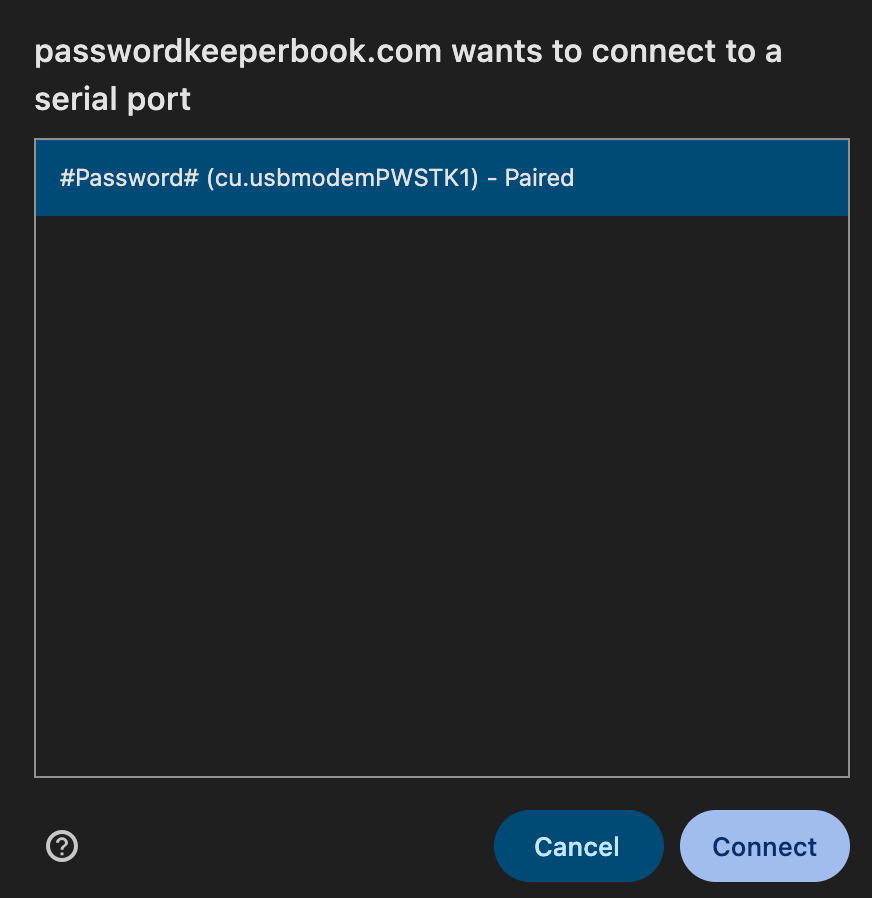
Select your Password Keeper device
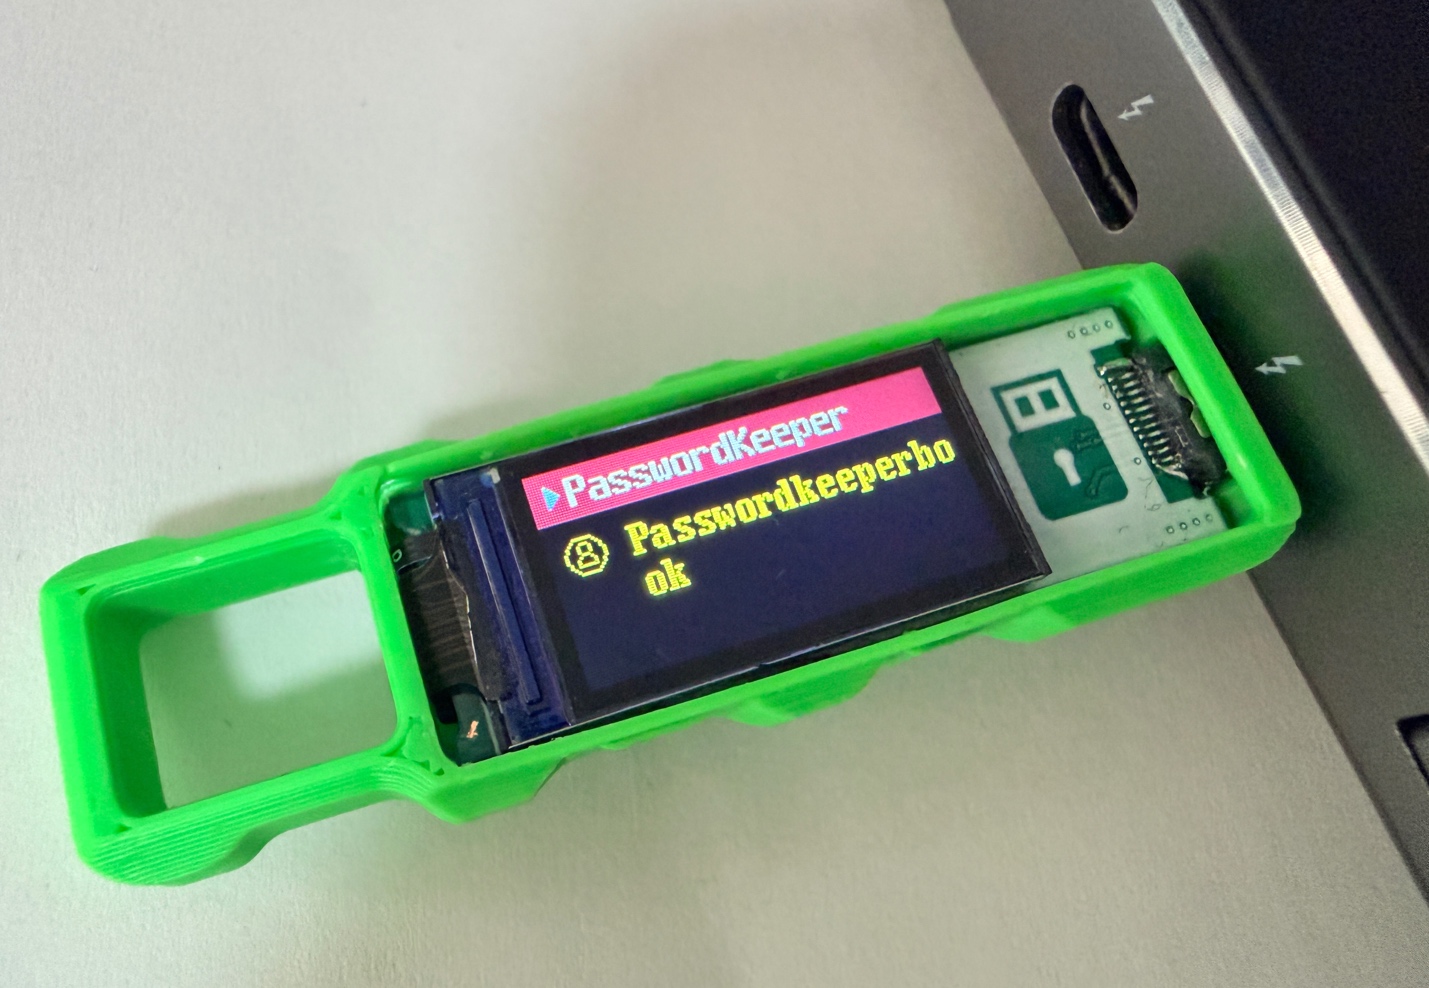
Connection Success
When connected successfully, you will hear a "beep" sound and the device's screen display will change.
Device connected - screen changes
Verify Connection Status
On the Chrome interface, when the "Connected" status light turns green, the connection is successful.
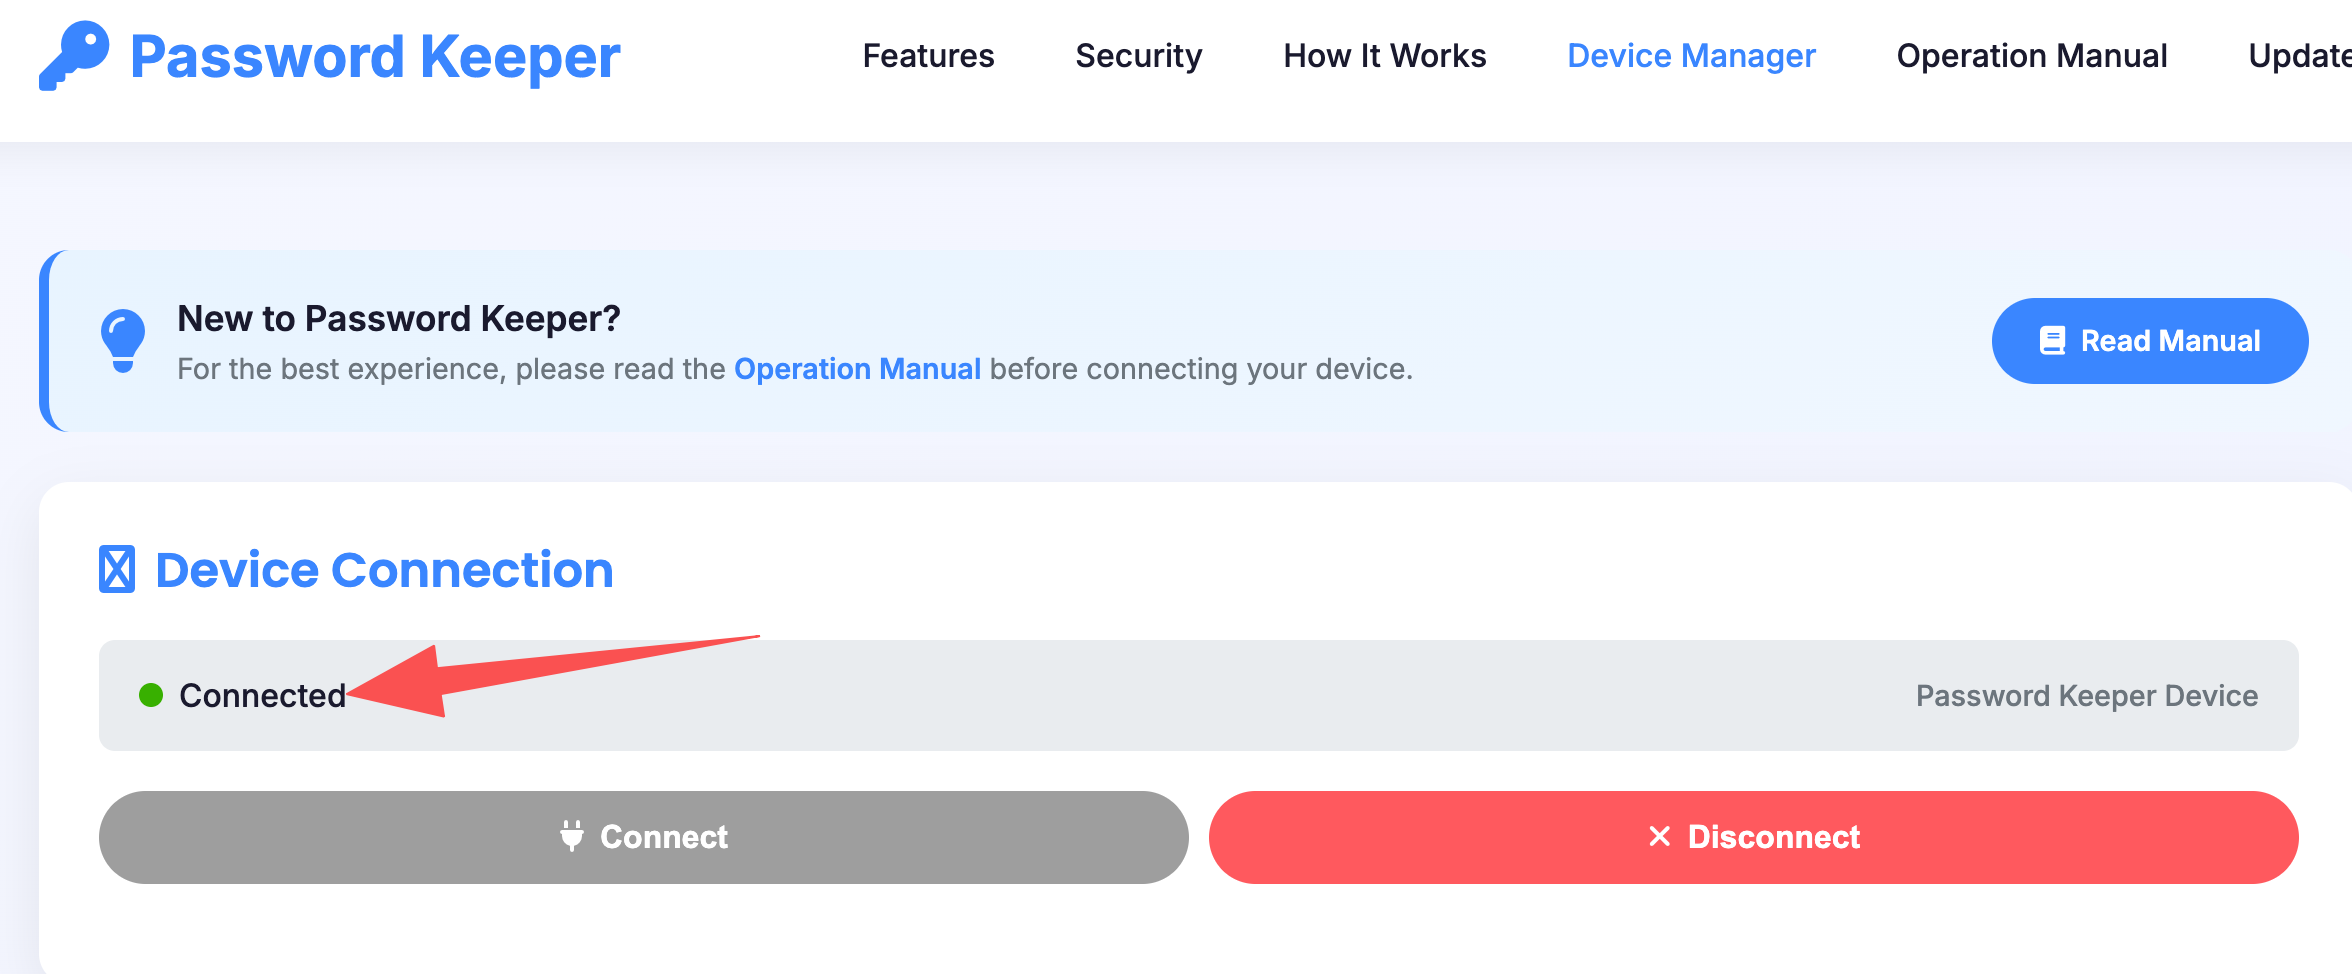
Green light means successful connection
Part 2: PIN Setup
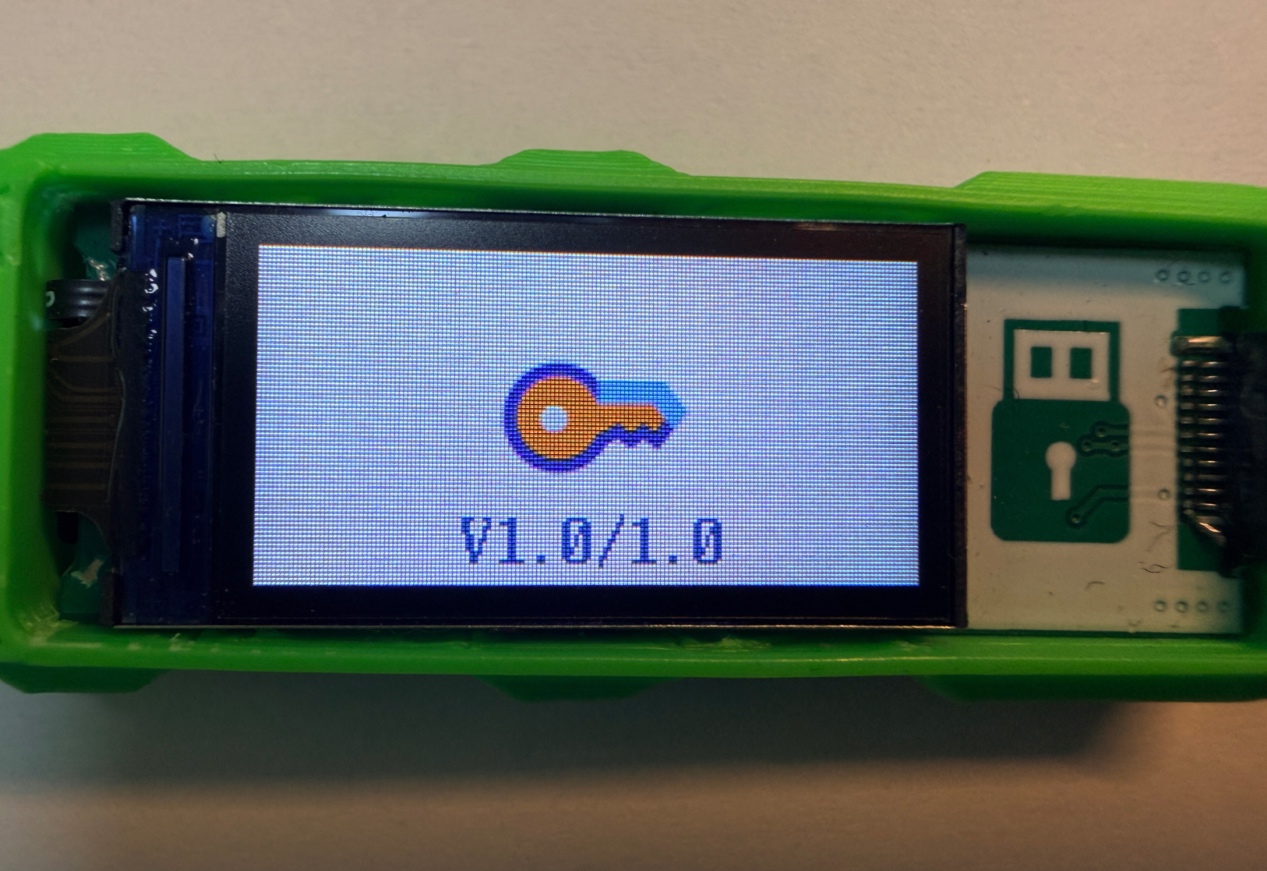
Check Firmware Version
Before setting a PIN, ensure your device firmware is version 1.0 or higher. Lower versions do not support PIN setup.
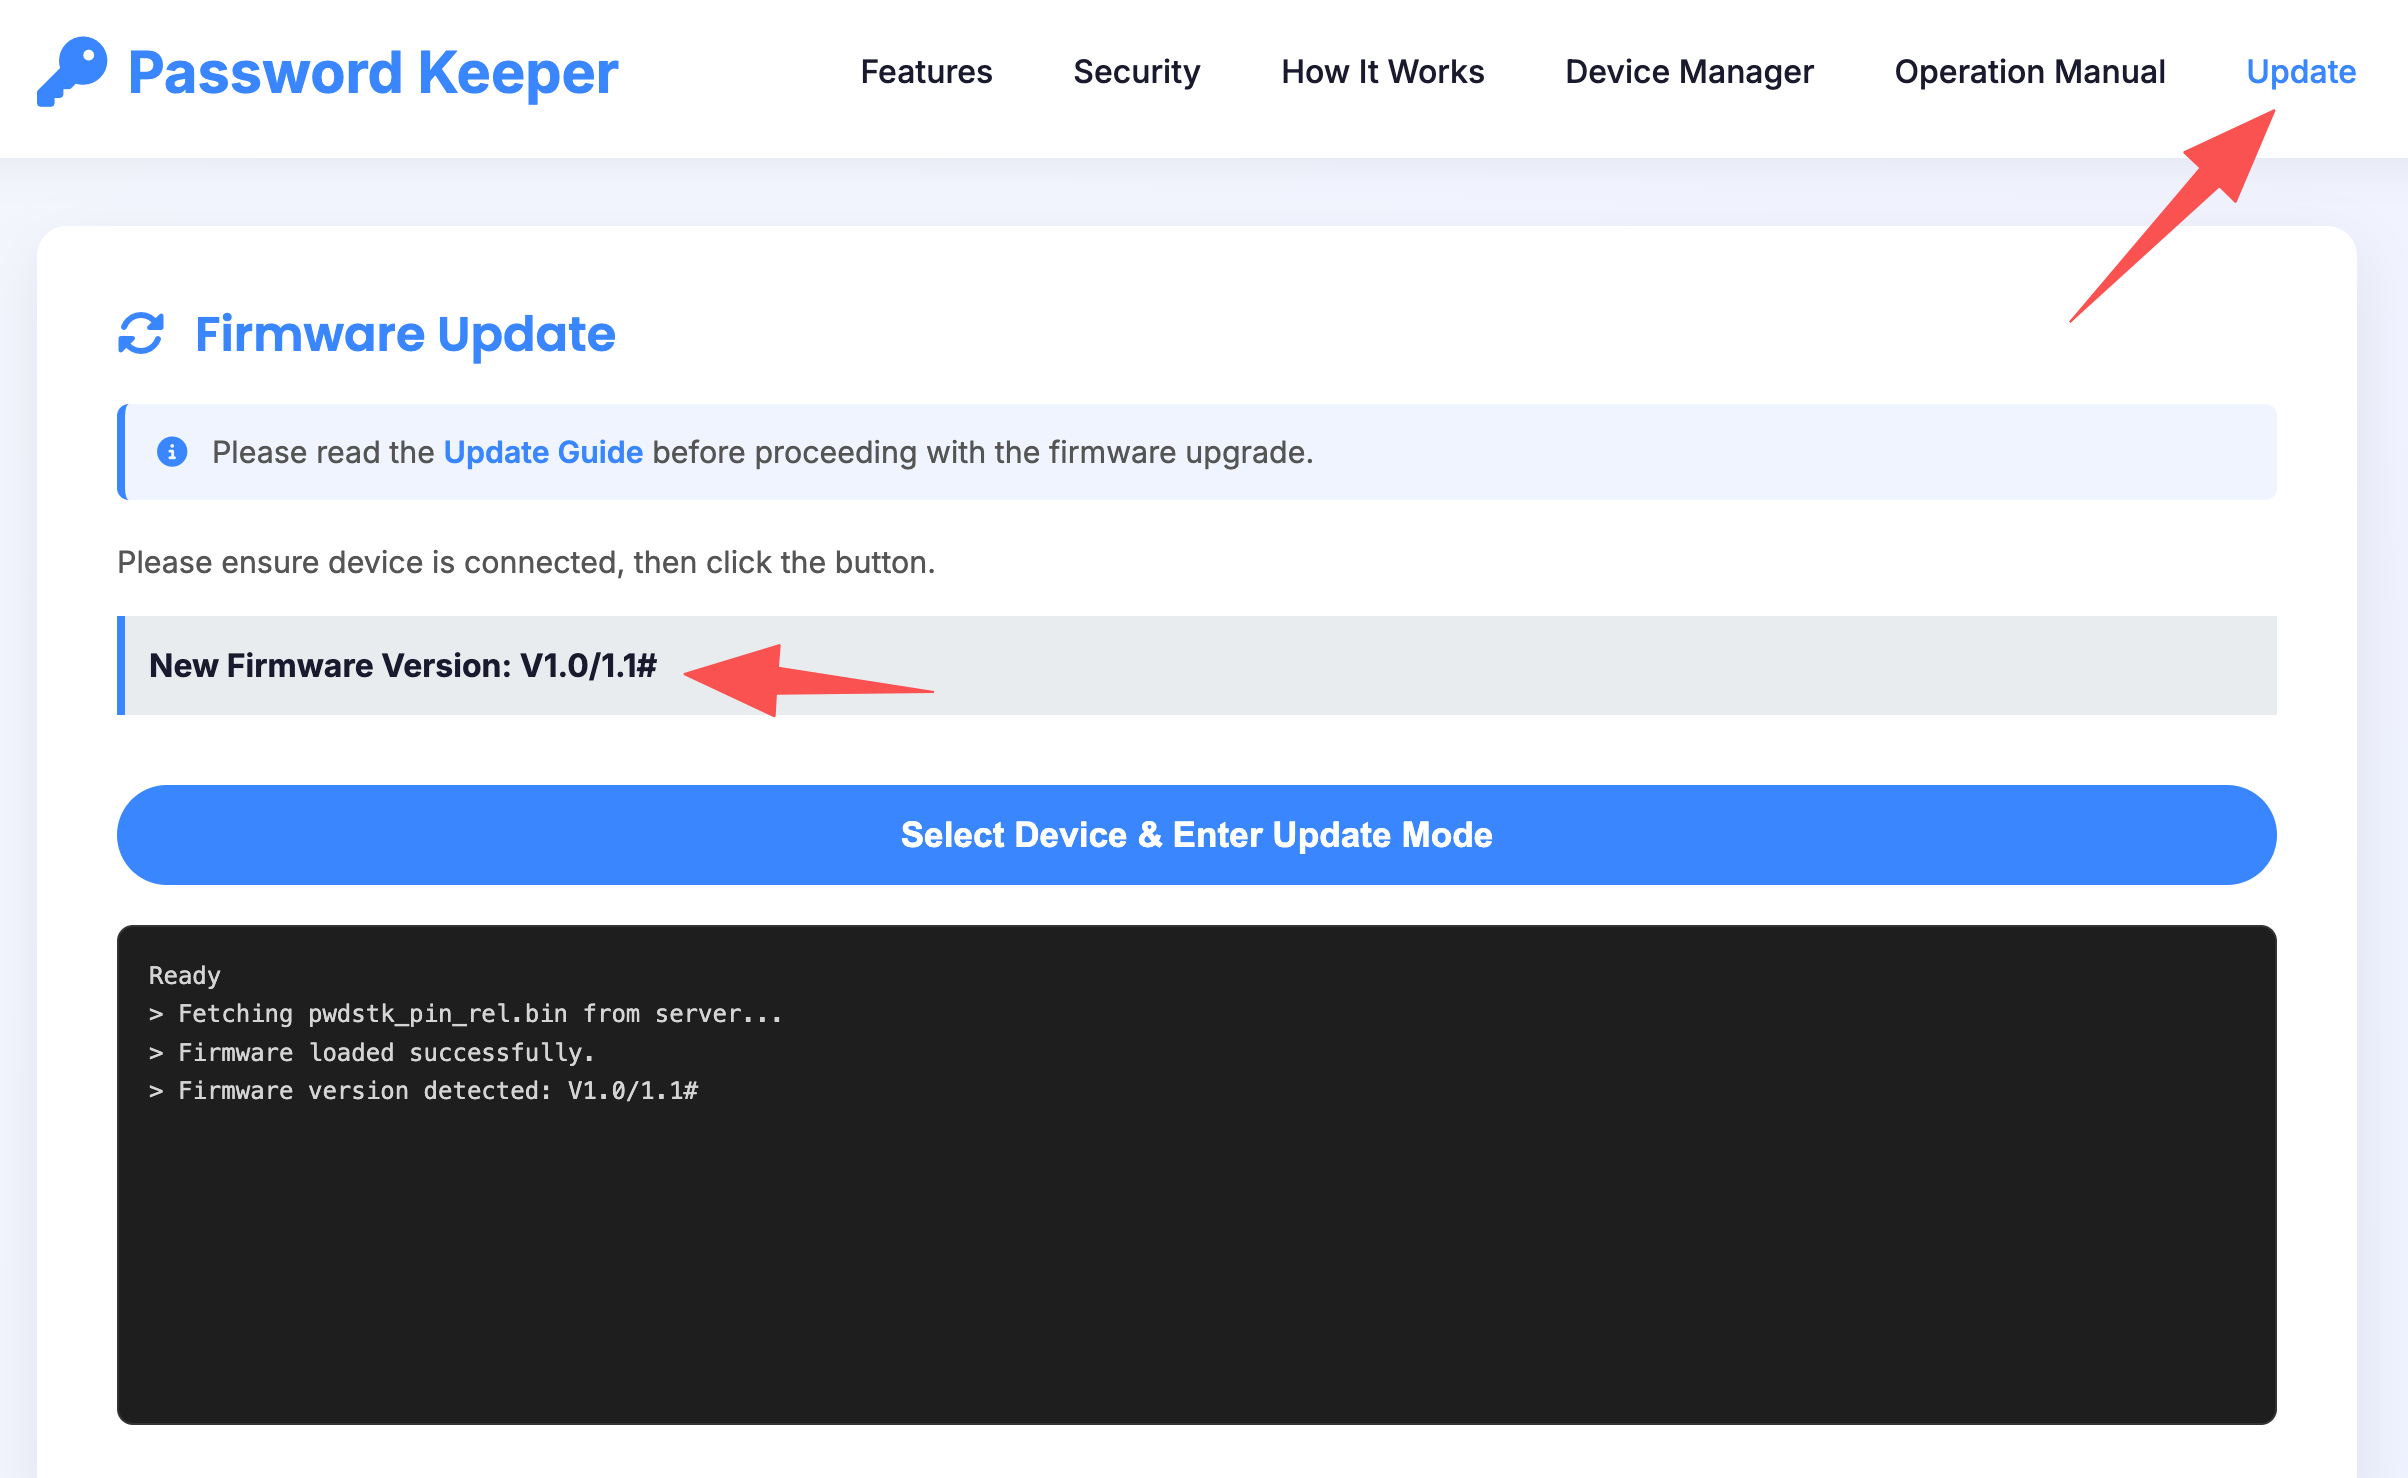
Check firmware version before setting PIN
Set PIN
Click the "Set PIN (1234)" button to set your startup PIN.

Click Set PIN (1234) button
Enter PIN Code
In the popup dialog, enter your 8-digit PIN. The PIN uses digits 1, 2, 3, 4 only.
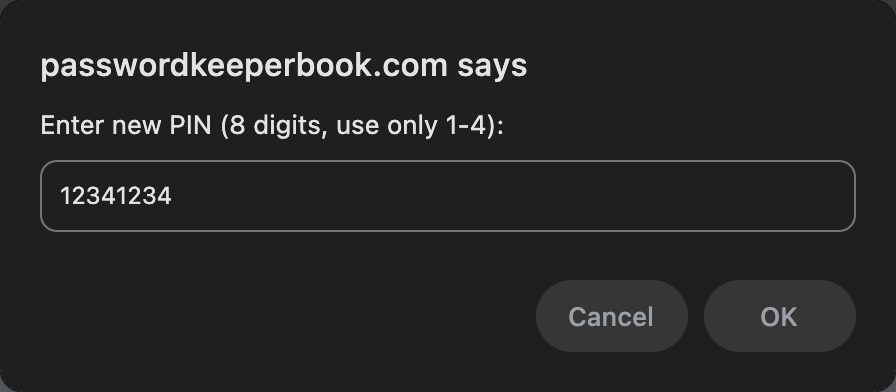
Enter your 8-digit PIN
PIN-Button Mapping
The mapping between 1234 and the 4 device buttons is shown below:
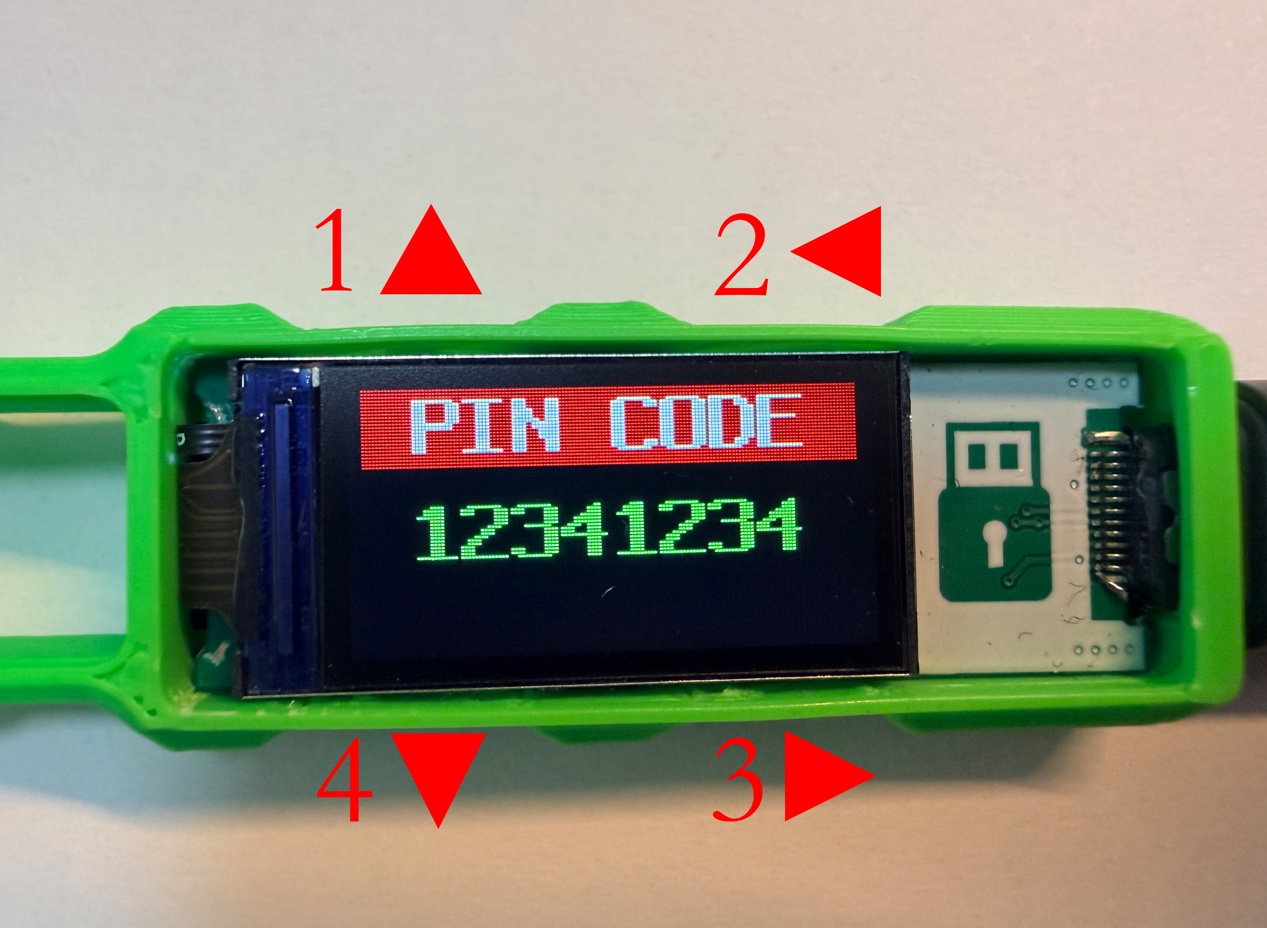
How digits map to device buttons
Part 3: Password Management
View All Records
Click "List All Items" to display all your stored password records.

Click List All Items to see all records
Create New Record
Enter a name in the "New item name (max 16 chars)" field, then click "Create" to add a new record.
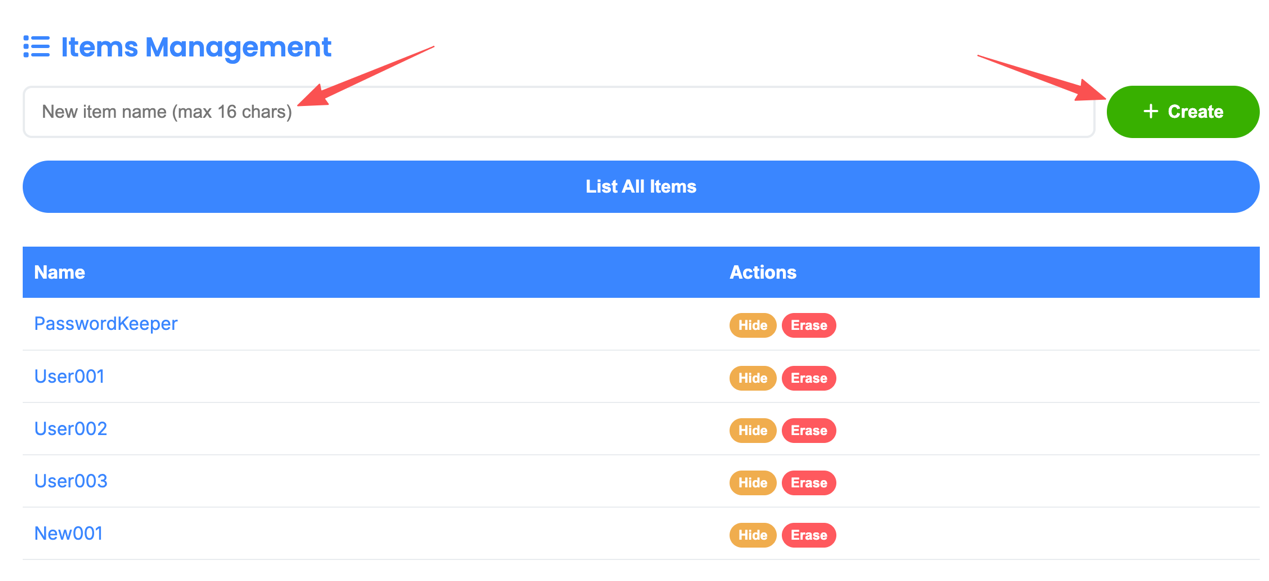
Create a new password record
Edit Record
Click on a record's "Name" to edit its contents.
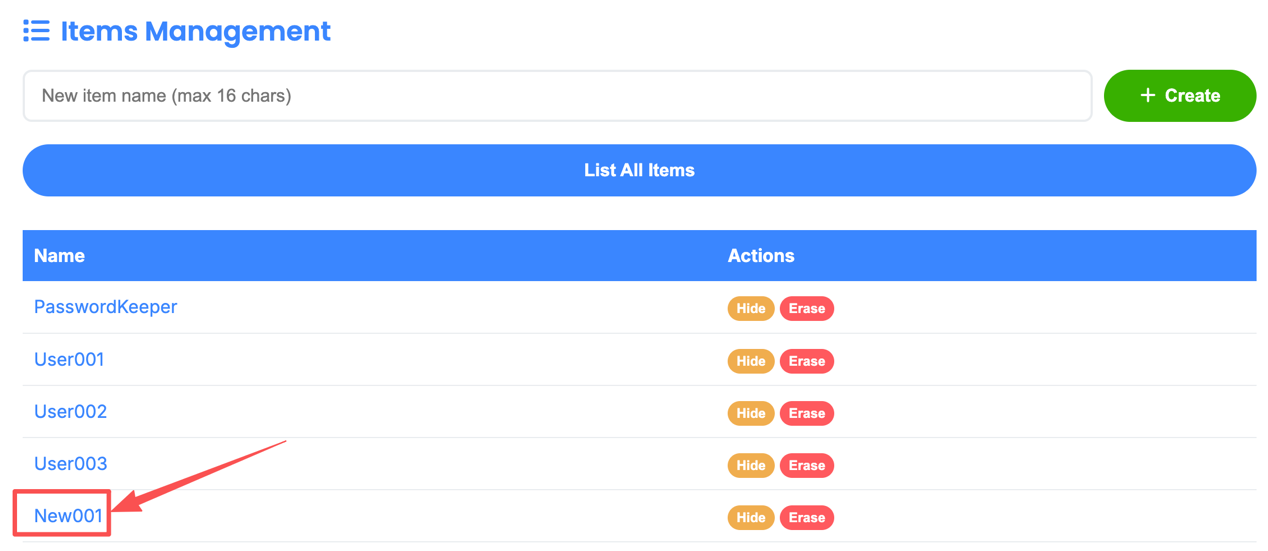
Click on a record name to edit
Edit Record Details
In the "Details" popup, you can edit:
- Account - username or email
- Password - login password
- Comment - additional notes
Pay attention to the character length limits. Click "Save Data" when done.
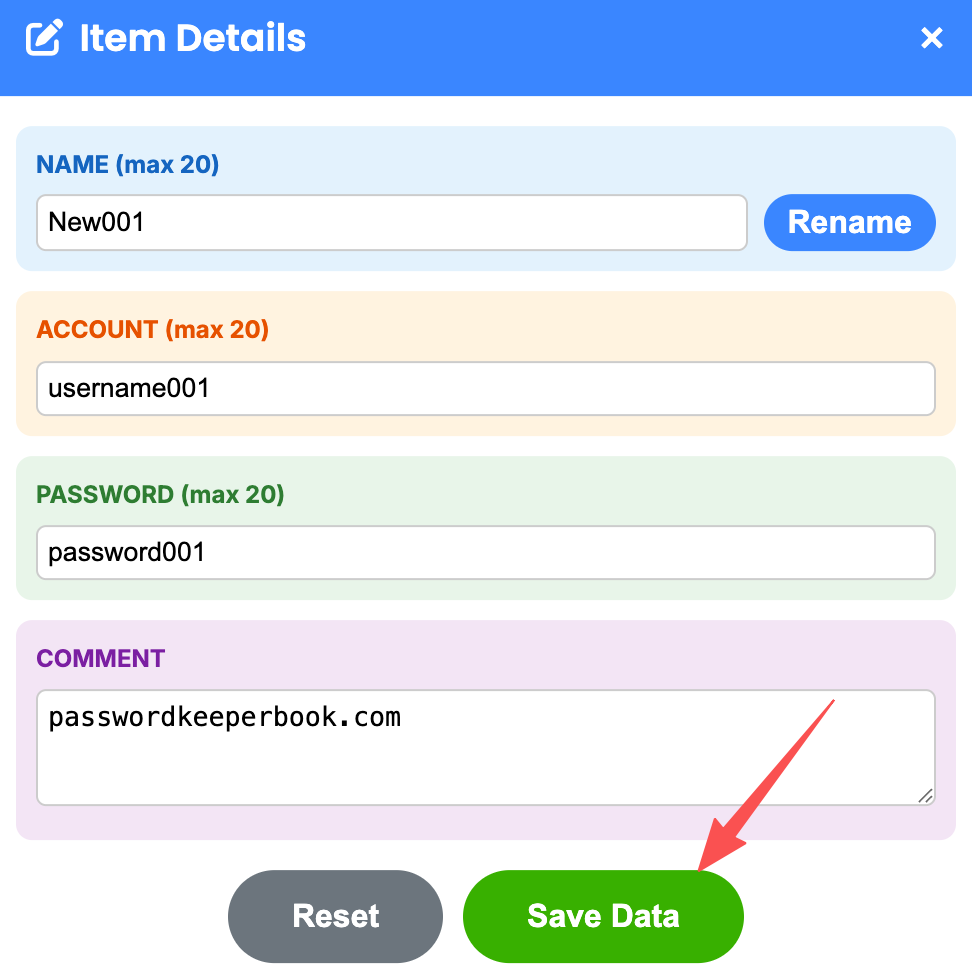
Edit Account, Password, and Comment
Hide & Erase Records
In the "Actions" list, you can:
- Hide - temporarily hide the record from the device
- Erase - permanently delete the record

Hide or Erase records from Actions menu
Disconnect Device
When finished, click "Disconnect" to safely disconnect the device.
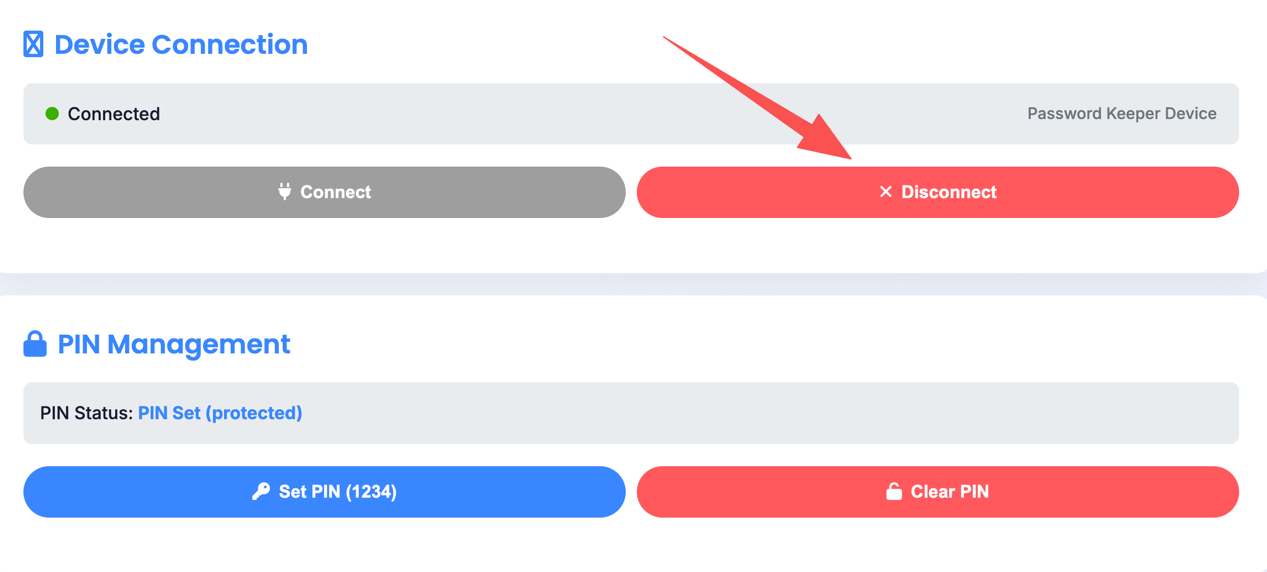
Always disconnect properly when done
Standalone Operation
The device can work without being connected to a computer. Simply connect a power bank or phone charger to power it.

Power with a power bank or charger for standalone use
Firmware Update
Update Device Firmware
If you need to update your device firmware, visit the firmware update page: